
Outdoor Citrus Frost Cloth Project
Hello friends,
Sometimes it's just easier to buy stuff you need for the garden, and especially when the task you need to complete takes up a lot of time.
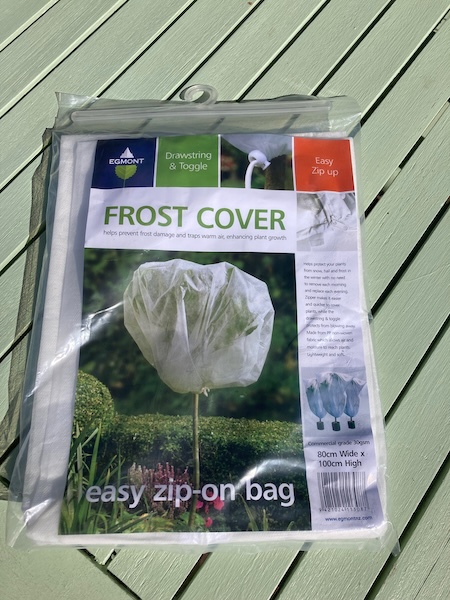
We were in the local garden center the other day and spied a new product on the shelves. Egmont is now selling a frost cover with a drawstring and toggle, and the frost cover is zipped on for easy placement and removal. The frost cloth is commercial grade, and the fabric is 30 gsm. I didn't buy one at the time because the bag is only 80 cm wide by 100 cm tall. The bag wouldn't be big enough to fit any of my citrus plants.
But after thinking about it over the Easter weekend, the bag would be big enough to use as a template to make larger versions that would fit my citrus plants. I went out and bought one after Easter, and it was only $10, which is a pretty good deal considering how big the zip is.
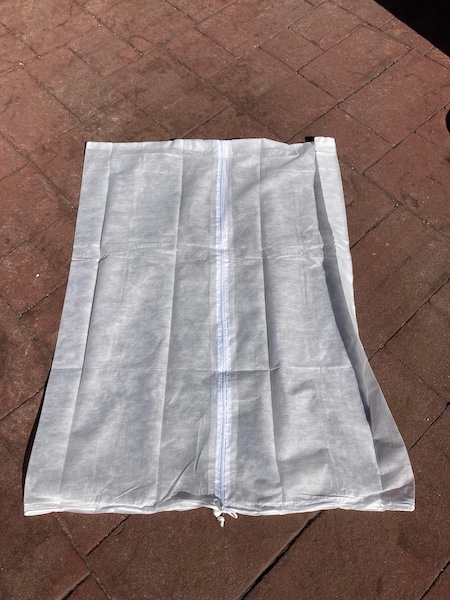
As you can see from the photos the frost cover bag is a rectangle which has been folded in two halves with a zip down the middle. The top is sewn across with a heavy seam which won't rip easily. The bottom contains a fabric casing to hold a thick cord, which is held in place by a strong toggle.
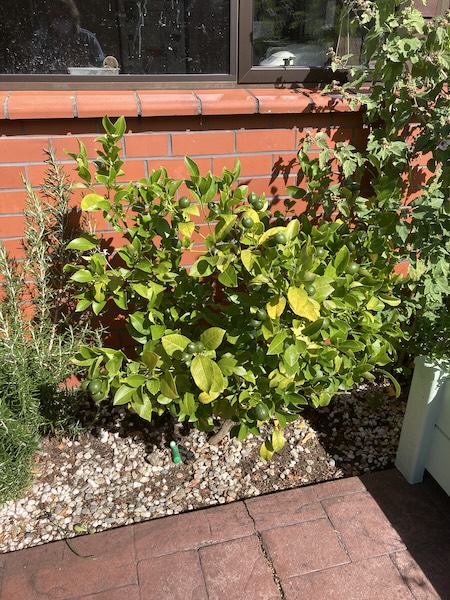
I tried placing the frost cover over the smallest citrus plant I have, which is our mandarin bush, and as you can see it is pretty squished inside the frost cover. It definitely needs more space so that the branches don't get squished. But the frost cover was pretty easy to put on, and the thick cord and the toggle did a great job of keeping the frost cover in place.

So even though I can't use this frost cover to protect my citrus plants, I can use it as a template to make bigger versions that I can use. And afterward I can use this frost cover for my small Camellia sinensis tea plant over winter, so that is a good bonus for me. In the coming weeks I'll make up the template for the citrus plants, and build a trial one for testing.
I did ask the garden center if Egmont planned on making bigger versions, but she said that this product had only just come onto market, so not likely this year. They were going to pass on my suggestion for Egmont make bigger versions in the future.
My suggestion is if you do have smaller citrus plants, that the Egmont frost cover is definitely worth buying for your plants over the coming cold season. With it being easy to take on and off, it'll save you time and protect your precious plants from any frosts that do happen.
I just need to now pull out all my current frost cloth stash and see if I have any frost cloth that can be used for making some bigger covers for my own plants.
Have a wonderful day
Julie-Ann
Want to discuss my post? Feel free to chat with me on Instagram or Mastodon or Bluesky.
Frost Proofing My Outdoor Citrus Plants With Liquid Frost Cloth
Hello friends,
Autumn is here, and the Autumn equinox has just been, and so with it comes the increased risk of frosts. The earliest frost we've had at our home since I started keeping records was on the 6th of April 2019, which is only 17 days away from today's date. All it takes is one cold front to come through, followed by a cold clear night, and a frost is possible. We've already had a low temperature of 3˚C this month, so there's definitely now a risk to my frost tender plants.

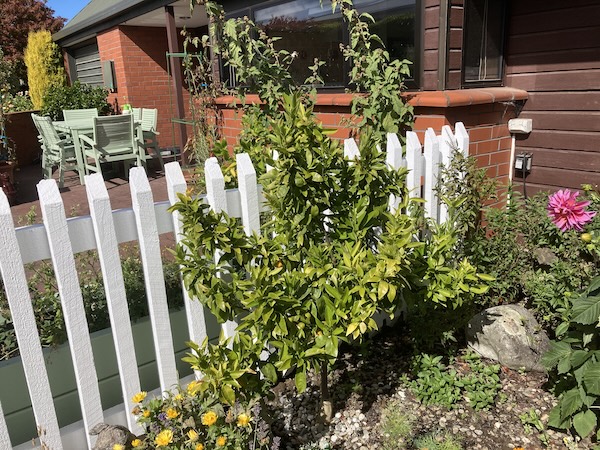
Our citrus plants outgrew their pots in spring last year, so they can no longer sit inside the glasshouse over winter for protection. I planted them in the patio in October 2023, so they now need to be protected from frosts and snow over the coming autumn and winters.
I plan to do this in a number of ways. The first one, which I've just done, is to treat all my citrus plants with liquid frost cloth, which is called Vapor Guard in NZ (you can buy this from garden centers). It protects plants down to -3˚C frosts by forming a protective wax coating over the leaves. Vapor Guard lasts about 6 weeks, as rain and frosts slowly break down the protective wax coating, and then it's time to spray Vapor Guard all over again. I keep a note of the dates I spray in my garden diary, and also calculate the next spraying day six weeks from then.
Vapor Guard does not protect the plants below -3˚C, so frost cloth is needed to protect the plants during the colder parts of the year. My plan over the next month is to build wooden frames, and then to attach frost cloth over the top. I'll then move the frames daily into position to protect the citrus plants when needed.
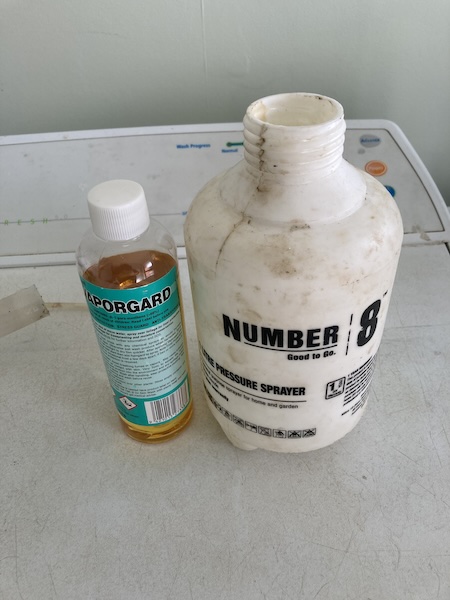
To treat the citrus plants with liquid frost cloth I added 15 mL of Vapor Guard to 1L of luke warm water. After giving it a good mix, I sprayed the liquid frost cloth onto the plant leaves on a dry and warm sunny morning with no wind. I wore gloves and a mask while doing so. The 1L of liquid frost cloth spray was enough to spray my lemon, mandarin, and lime plants, and also enough left over to protect my Camellia sinensis (tea plant) too.
My plants then had the rest of the day to dry, and for the wax to set. They're now protected from frosts for the next 6 weeks, we don't usually get heavy frosts until late May/early June, so I now have time to build the protective frost cloth cages.
I'm relieved to have done this, as the last week has been quite rainy, which meant I couldn't get a window to get this garden job done.
There will be no blog post next week, as hubby and I are having a much needed staycation between Otago Anniversary Day and Easter. Well be relaxing and eating hot cross buns and chocolate, and I hope to make strawberry and raspberry jam as well. I'll post again in early April.
Have a wonderful day
Julie-Ann
Want to discuss my post? Feel free to chat with me on Instagram or Mastodon or Bluesky.
Growing and Harvesting European Linen for the 2023-2024 Season
Hello friends,
As a crafter and a gardener, I like to combine my hobbies in interesting ways. In this case it was growing and harvesting European flax (Linum usitatissimum) in order to prepare some linen for spinning and weaving.
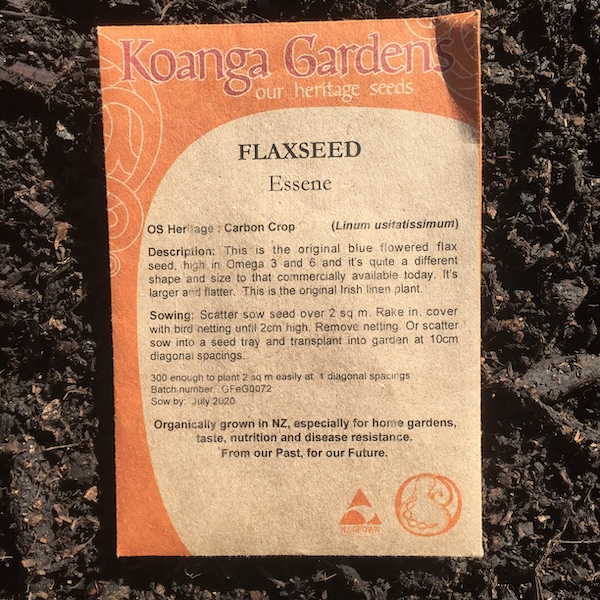
Back when we lived in Wellington I bought some Essene European flax seed (Linum usitatissimum) from Koanga Gardens. In the first year I sowed half the seed packet into a 1 m x 2 m space, and grew the linen plants mainly for producing seeds, so in years afterward I could grow even more flax for linen. My linen harvests thereafter would be self-sustaining. I now grow linen every couple of years for collecting seeds, and stockpiling flax stalks for making linen.
This blog post is showing the process of growing linen from seed sowing to harvesting. In later blog posts I'll share as I go through the flax processing and then spinning and weaving it.
The first thing I did was buy the book "Homegrown Linen: Transforming flax seed into Fiber." by Raven Ranson. This book is very detailed, and shows all the necessary steps in growing homegrown flax for linen. I then used it to calculate how to grow it in New Zealand seasons.
The first step in growing flax seed is deciding when to sow the seed. Flax seed is sown in spring when oats and barley are sown, and in our case it was in mid-October. If flax is grown for linen then the seeds are grown very close together so that long tall stalks are produced, but if flax are grown for seeds, they are planted further apart to allow for branching and more flower production.
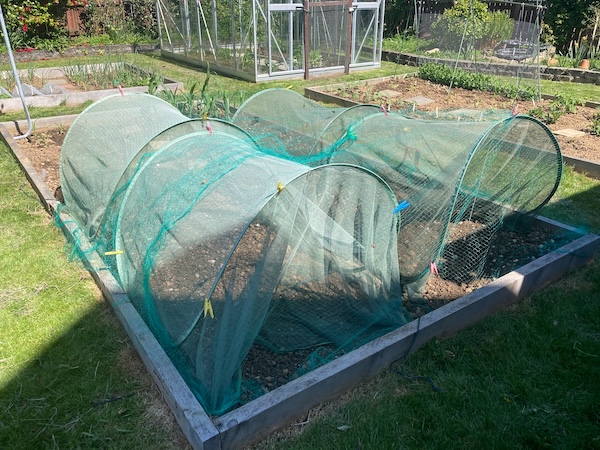
After weeding the patch of ground it was to go into in spring last year, I fertilized it with a high nitrogen fertilizer in the form of sheep pellets, and then prepared the soil to a fine tilth. I then sowed the flax seed in a broadcast fashion very close together, so that the linen plants would grow very tall, with little to no branching. After covering the seeds over with a fine layer of soil using a rake, I watered the seeds in, and then covered the crop with bird netting to protect the seeds from the local very hungry avians. It takes approximately 100 days from seed sowing until plant harvest, so this was classed as day 0.
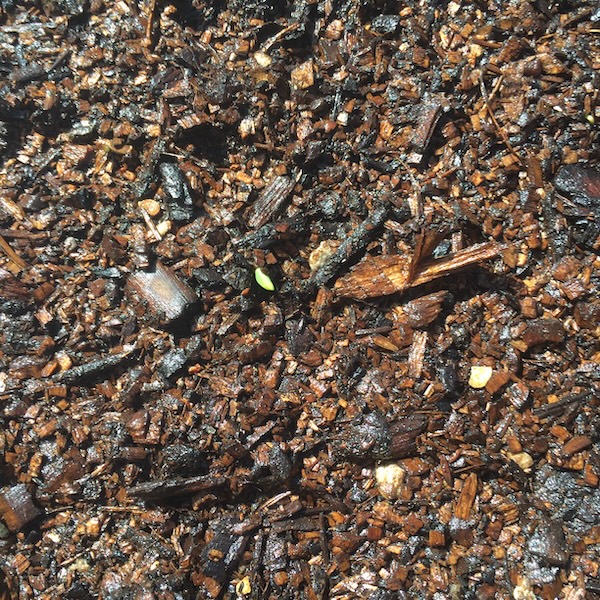
Within a few days of watering each day, the flax seedlings began to appear. It is always very exciting to see them come up.
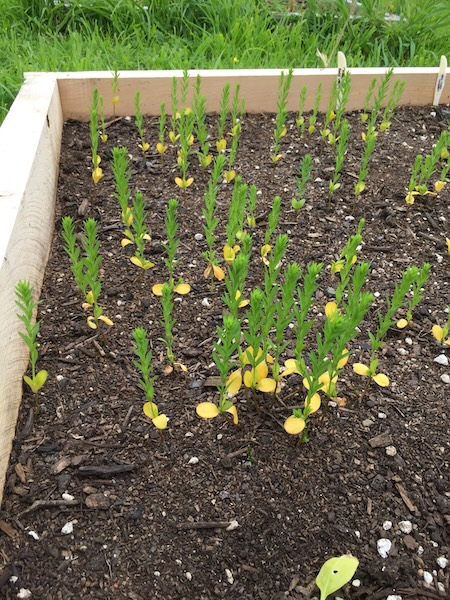
And within a week, the seedlings were actively reaching for the sky. In the photo below I was growing the linen plants for seed, but as you can see, I spread them a little too far apart.
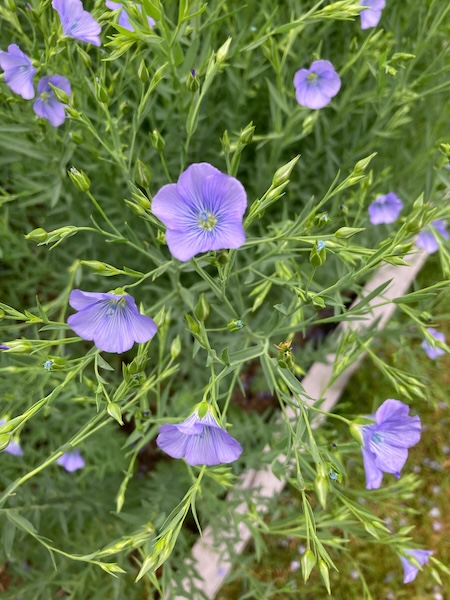
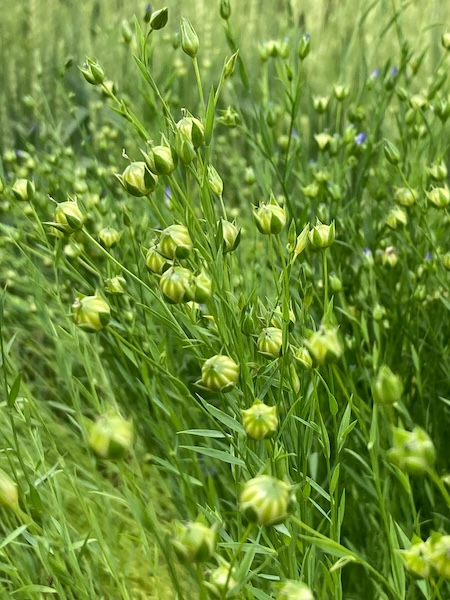
Once the flax starts growing, it basically fends for itself. If sown very close together no weeds will grow, making it an easy crop to take care of, as long as it gets enough water. And once the flax reaches about 50 cm tall, it begins flowering at around day 60. The beautiful blue flowers open during the day, and close again at night. And now that the plants are tall, they sway very prettily in the breeze.
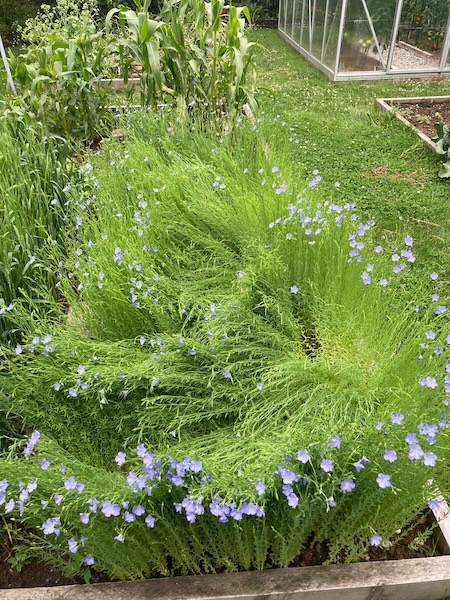
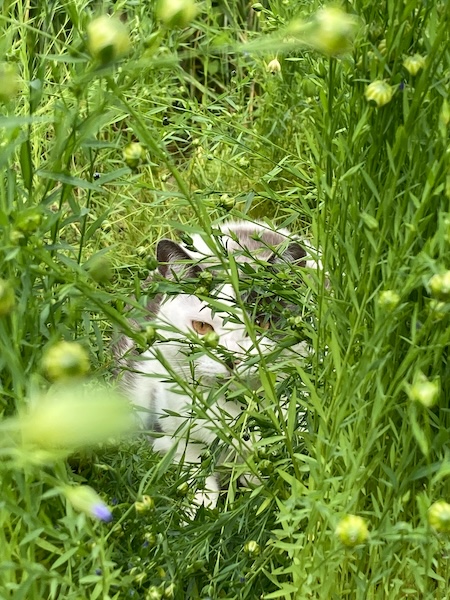
Flowering and setting seed boils takes around a month. One of our neighbourhood cats, who we call Patches, decided to make their snoozing spot inside the linen crop. No matter how many times I tried to shoo them away, they kept coming back, so I let them be. It's a good thing they're cute because they ended up squishing a bunch of linen...
Once the seed heads (boils) have set, now is the time to think about when to harvest. It's a good idea to set aside a section of your crop to let the boils (seed heads) mature and turn brown, which means they are then ready to harvest for next years seeds. Their plant parts will be dry and thick and yellow, and they won't make good linen.
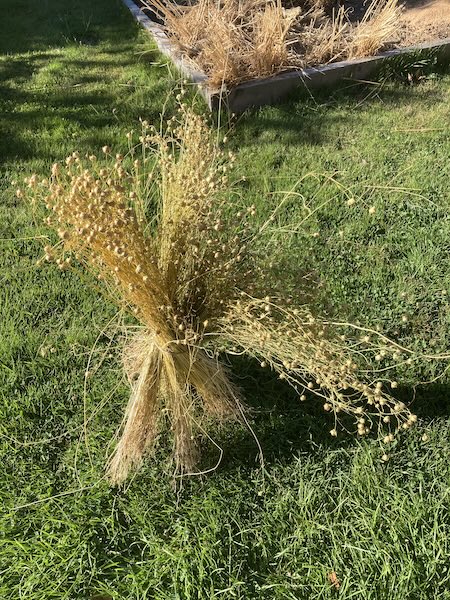
The rest of your crop will be used for producing linen. When the bottom half the plant has turned golden, it is time to harvest the plants. The seed heads will not usually be viable for collecting seed, but I've found in the past that some of them can be.
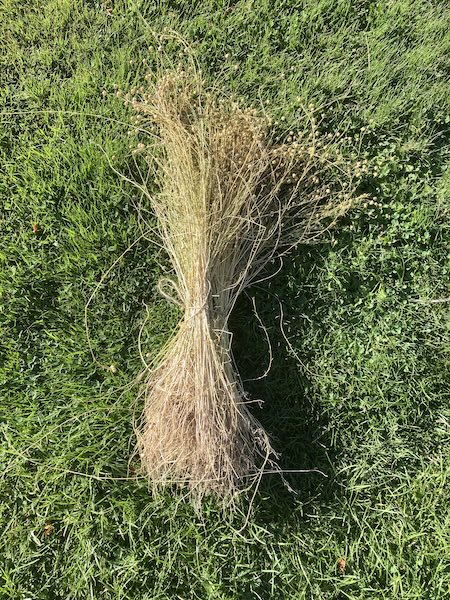
The best way to harvest linen is to pull them out by hand in clumps. Lay the harvested linen plants out on the grass, all facing the same way, with the roots at one end, and the boils at the other. Once you've harvested all the linen plants, it's time to stook the plants, which means creating bunches of sheafs, and then tying them in the middle like the poles of a teepee. You want air to get up into the middle of the sheaf to dry it out. Place the sheafs upright with the roots at the bottom and let them dry in the sun on sunny days.
Once the linen plant sheafs are dry you can store them until you want to begin processing your linen. The next step is processing my current linen crop, and this will occur in a couple of weeks after autumn starts...
Have you ever tried experimental gardening? I've done this in the past with growing wheat, and it's very interesting to see how food and fibers are processed. It makes you appreciate how complicated food and textile production is.
Have a wonderful day
Julie-Ann
Want to discuss my post? Feel free to chat with me on Instagram or Mastodon or Bluesky
Planting the first of my Potatoes
Hello friends,
I finally started planting out my potato tubers for the spring growing season. I meant to do it a couple of weeks ago, but more urgent gardening tasks got in the way. Every year I grow four different varieties of potatoes in the garden, and each variety we use for different reasons.
The first potato variety I grow is Rocket, it's a 1st early potato which only takes 60 - 70 days to maturity. I like planting these in early to mid-September as it means they will be the first potatoes to be ready to eat in mid-November for boiling and roasting. The second variety of potato I grow is Jersey Bennes which is a 1st early potato that reaches maturity in 80 - 90 days. When planted at this time of the year the potatoes will be ready to eat in time for Christmas, and we eat them boiled and also in potato salads.
The other two varieties of potato I grow are Ilam Hardy and Haylo, but they won't be planted until October. Ilam Hardy is a 2nd early/main potato that takes 70 - 80 days to maturity, and is great for mashing, baking, roasting, chips, and wedges. We mainly use this potato for turning into gnocchi, and also in potato and leek soup. The last variety of potato I grow is Haylo, which is an improved variety from the Agria variety potato. It is in my opinion the best roasting potato, and we in fact did an experiment one year to test this. I grew Ilam Hardy, Agria, and Haylo one year, and compared roasting them using hubby's double cooking method for making roast potatoes. Haylo was by far the best tasting roasted potato variety. Haylo is a 2nd early/main potato, and matures in 80 - 90 days.
With these four varieties of potato growing in the garden, we are self sufficient in eating potatoes pretty much throughout the year in various forms, thanks to storing gnochhi and potato and leek soup away in our chest freezer.
I began chitting both the Rocket and Jersey Bennes potato varieties back at the beginning of August, and it wasn't long at all before they started growing, and by the time it was actually time to plant them, they'd unfortunately gotten too big. A disappointment for sure, but they were still fine to plant into the ground, I did so very carefully, taking care not to break any growing shoots.
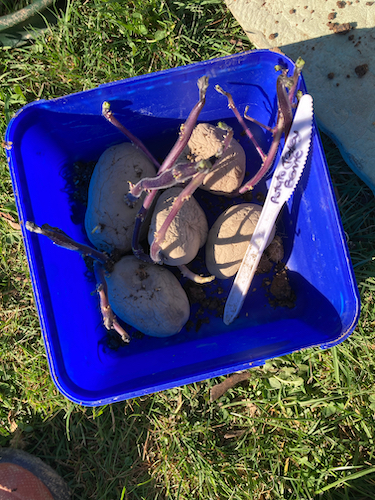
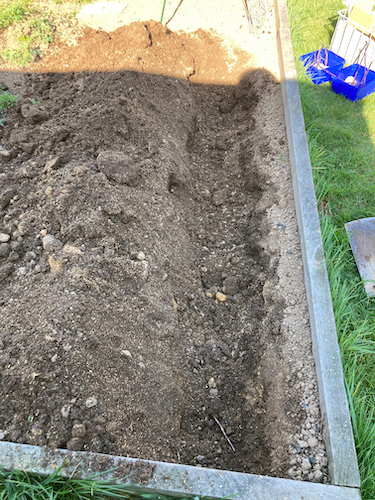
After digging two trenches in an area of the vegetable garden, I sowed five of each of the Rocket and Jersey Benne tubers into the ground. I always plant them in order from right to left, with the Rocket on the far right, then the Jersey Bennes to the left of them. Experience has taught me that the Rocket variety will indeed rocket up and produce a copious amount of leaves which will smother any other growing potato plant varieties, and block them from sunlight given half a chance. If I do it this way, any new rows of potatoes will get morning sun preferentially to the rocket potatoes.
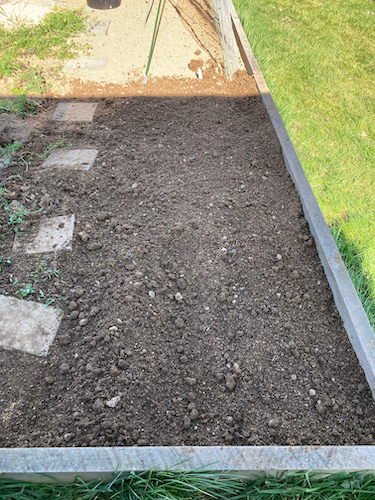
It didn't take very long to plant those potato varieties, and then gently cover them over with soil. For the next few weeks as they grow up they'll be safe from any late frosts, and once they're above ground, I'll cover them with frost cloth every night until the last frost has passed.
In a couple of weeks it'll be time to plant the Ilam Hardy and Haylo potato varieties, but before that can be done, I need to transplant some dye plants I have in that part of the vege garden. But before that can be done, I have to prepare another area of the garden for the dye plants to move into...
It's pretty much a big juggling job in the garden right now, with the most urgent tasks being done first, even though they may not be the tasks I want to do. And I'm now behind in seed sowing as well, but I will get there I'm sure. The next rainy day in the garden will be a huge seed sowing session, and my aim will be to sow everything else that needs to be sown.
Have a wonderful day
Julie-Ann
Want to discuss my post? Feel free to chat with me on Instagram or Mastodon.
Spring Seed Sowing Week 1
Hello friends,
We're now into the last month of winter, and it's finally time to start sowing seed for spring. It's a tricky time of the year, as it's possible to get snow here in Dunedin even into the first week of October, so there's nothing worse than sowing seeds too early, and then having to try and keep them alive if there's a late frost or snow in early October. Last year we had snow laying on the ground the first week of October, and a couple of frosts the weeks after that, so it was a stressful time trying to keep all my seedlings alive, looking after my growing potato plants, as well as my new dahlias which had just popped out of the ground. Seedlings don't get transferred outside and into the vegetable garden until Labour Weekend, which is the third weekend of October, so that's a long way off right now.
I have a specific order in which to germinate seeds, so that I don't have too many plants sitting in the glasshouse for such a long period of time. The first seeds sown are my tomato plants. I grow enough plants for our own needs, but also for family members as well. I usually have at least 12 plants growing in our glasshouse, and poke any others that are spare in free space I have in the vegetable garden. We eat a lot of tomatoes fresh throughout the summer, but the bulk of it is frozen away for using in autumn and winter cooking.
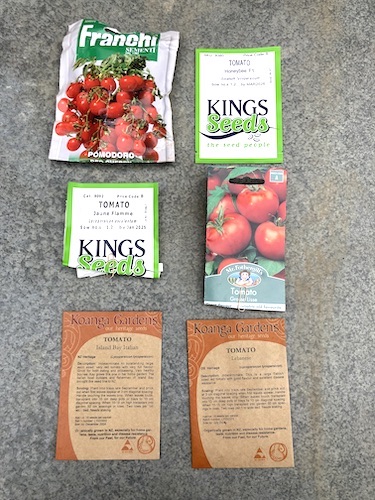
This year I'm growing the following tomato varieties:
Franchi Sementi Pomodoro Red Cherry - A red cocktail tomato with great taste. This is no longer for sale in New Zealand, I save this seed every year.
Kings Honeybee F1 - I haven't tried this one before, I wanted to try another cocktail tomato, we'll see how this goes. One of my sister's grows her tomatoes outside, and it's far easier to ripen smaller tomatoes in Dunedin's short summers.
Kings Tomato Juane Flamme - Our favorite tomato, an orange tomato with the best taste of any tomato I've ever grown.
Tomato Grosse Lisse - A beefsteak tomato that was a favorite of my grandfather. The best tomato for putting a slice on a hot piece of toast, and eating it with a pinch of salt on top.
Tomato Island Bay Italian - I haven't grown this tomato variety before, but I've heard good things about it. Good for eating fresh and processing apparently.
Tomato Lebanese - Also a new tomato variety this year, I'm hoping it will have good disease resistance, and tastes good too.
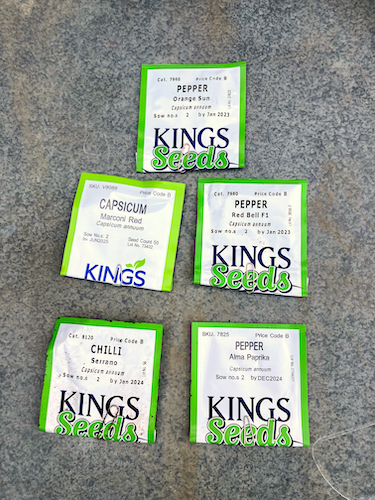
The next seeds to be germinated are my chilli and capsicums plants. I've successfully grown chillies in our greenhouse, but I haven't had any luck with the big traditional bell pepper capsicums.
This year I'll be growing the following chillies and peppers:
Chilli Serrano - I had a huge crop of chilli last season, so I'm growing this variety again.
Alma Paprika Pepper - Trying once again to grow my own paprika. Last season they didn't grow as well as I hoped, am trying again for the last time.
Capsicum Marconi Red - A prolific sweet Italian variety. I'm hoping that it's narrow shape will mean it ripens faster.
Capsicum Orange Sun - My last attempt at growing a bell pepper variety.
Capsicum Red Bell F1 - Also another last attempt at successfully growing a bell pepper variety.
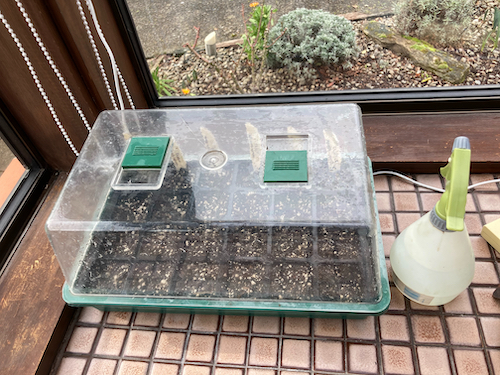
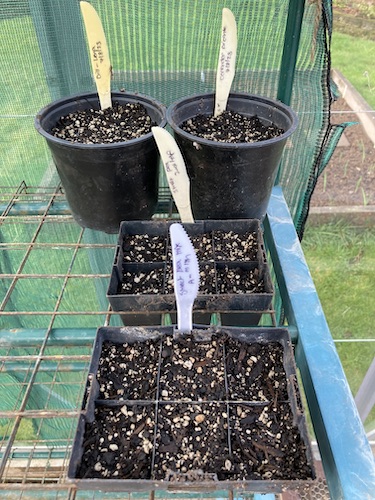
The tomato and chilli seeds were sown into two mini greenhouses, and placed in a warm sunny spot in our dining room. It's warm in there on sunny days, and also thanks to the benefit of our wood burner being in that room, they're kept warm in there every night in winter. I'm eagerly waiting for the seeds to germinate.
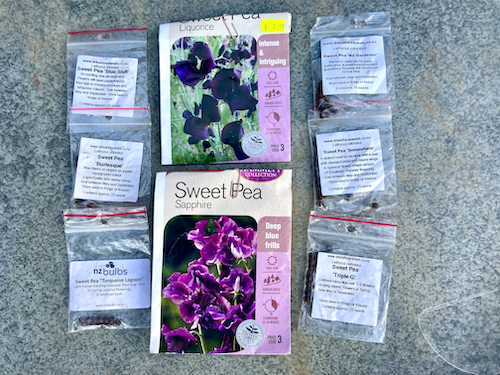
The next seeds to be sown are all my sweet pea varieties. I've collected quite a lot of Keith Hammett varieties over the years, he's a New Zealand breeder who produces the most stunning sweet peas. Sweet peas germinate in cool temperatures, so they are now potted up and put into the glasshouse.
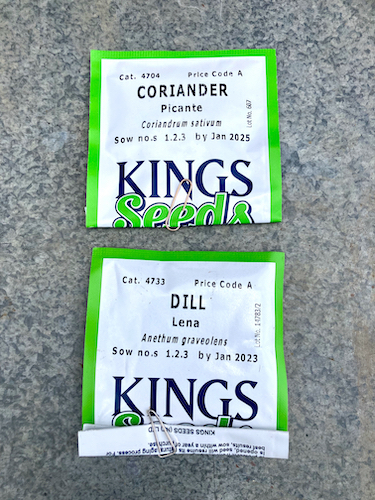
The last of the seeds to be sown for now are the herbs coriander and dill. Coriander prefers to grow in cool temperatures, otherwise they will bolt, so I sow one lot in late winter, and another in early autumn. They don't like to have their roots disturbed while planting into the ground, so I sow a bunch of seeds into a biggish pot, and then when it's time to transfer them into the herb garden, I plant the whole container worth in one spot, I don't separate out the seedlings at all. For the dill seeds I do the same thing as with the coriander, it ensures I get a relatively big crop of leaves without the problem of using up a lot space.
The sweet peas, coriander, and dill are all now sitting in my glasshouse. We're were expecting snow down to 200 m last night, so I've put off doing any more seed sowing tomorrow. Hopefully soon they will be joined by a lot more seeds as the month goes on.
Have you started seed sowing yet? I'm interested in what choices you've made for the coming growing season.
Have a wonderful day
Julie-Ann
Want to discuss my post? Feel free to chat with me on Instagram or Mastodon.
Social Media


Archives